A Happy Birthday
A happy birthday was had by me. My extended Labor day weekend was just the get-away I needed to sit down and get to know my birthday Kiwi. Thanks to Mr. Rich, my parents, and my siblings I have acquired another hobby!
I previously mentioned my ordering the Kromski stool and for some reason no one wanted me to have it. After attempting to order the stool 5 times from 5 different places, I decided it was fate and purchased the Ashford Spinning Chair instead. I ordered my unfinished chair from this lovely guy named Bob who is the proprietor of Winderwood Farm in upstate New York. He was terribly disappointed that he couldn't acquire the Kromski stool for me and gave me a discount on the Ashford Chair! What a nice guy! So 2 weeks before my Labor Day Holiday I received my chair, stained and sanded and coated it and made a little seat pillow for my optimum spinning comfort.
The Sunday before Labor day weekend my family had a joint birthday celebration for me and my dad. Thanks to Mr. Rich, my parents, and my siblings, I now have my very, very own Ashford Kiwi. I spent my afternoons after work during the week leading up to Labor Day weekend sanding and staining and sanding and coating all the wooden parts.
Materials
1 small can Minwax Pre-Stain treatment
1 small can Minwax Water-based Stain in Vermont Maple
1 can Minwax Wipe-on Polyurethane
Foam brushes
Lint Free Cloth
Sand Paper (Very Fine, and Super Fine grades)
A few nice dry days outside
A sturdy table
Some cardboard/newspaper to set pieces on while you stain and dry
Patience
A lot of time
Step one: Lightly sand all wooden surfaces with the grain until smooth.
Step two: Apply Minwax Pre-Stain treatment, wipe off excess and let dry for 15min. Sand lightly.
Step three: Apply even coat of Minwax Water-based stain with a foam brush and rub in with a lint-free cloth. Allow to dry for 2 hours then sanded lightly.
Step four: Repeat step three
Step five: Repeat step three but let dry for 24 hours then sand lightly.
Step six: Rub-on Minwax Wipe-on Polyurethane with a lint free cloth and let dry for 2 hours then sand lightly.
Step seven: Repeat step six.
Step eight: Repeat step six but allow to set for 24 hours then sand lightly.
Step nine: With a lint free cloth, wipe down all pieces to remove any sanding dust.
In my excitement to put my spinning wheel together, I spent my day off the Thursday before the big weekend working on the finishing touches. I did not follow the instructions to wait 24 hours to let the polyurethane cure. In my haste I brought all the parts indoors and commenced putting it together and ended up with a panic attack thinking I was going to die of heart failure because I was exposed to the sicky fumes. The panic attack subsided and I continued to put it together the next day.

These are the tools needed to put the Kiwi together.

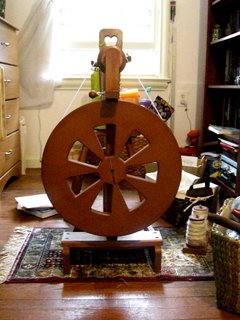
Here is my finished and built Kiwi!


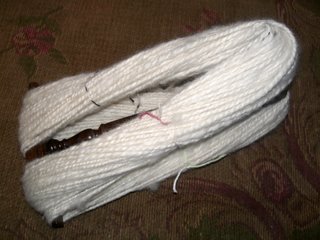
Double-Plied and on the niddy-noddy.

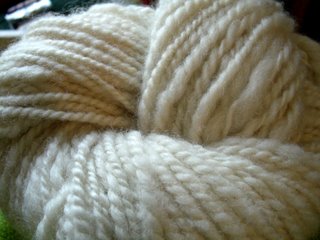
After a bath and hung to dry the twist is set!
It's kinda slubbly but I love it!
Just having the Kiwi isn't enough. I had to complete my little wheel with the large flyer adapter and some extra bobbins, so between Labor Day weekend and today I placed an order for the adapter and worked on staining it as well. So in total I have the wheel which came with the high speed flyer adapter, 6 extra bobbins (so 9 total), and the large flyer adapter for spinning bulky yarns.
And finally on the knitting front (yes I am still knitting) I completed 2 pairs of socks recently, both in Mountain Colors Superwash, one pattern in Cherry Tree Hill Super Socks, and the other in my first pattern making attempt ever, I'm not sure what to call it yet.
So yep, that's what I've been up to, and that's why I've been so quiet the last half of August. I'll have more yarn to speak of in a few days, and hopefully I'd have mad some progress with my other sock projects.


No comments:
Post a Comment